Pages

Wednesday, November 24, 2010

So excitement! (reno's part 1)

Lately ive been indulging a little in my creative decorating side.
We are doing some major renovating on our nest and it has made me giddy with excitment. We've lived here for approx 3 years and only done the minimal in renovating..slow and steady.
However the last few weeks has been so exciting. Things are flying here.

We have built a fence (brick, rendered) out the front of our home and taken all our unclaimed land back. This means around our pool we have loads more room. we are planning to deck around our pool and pave the front entrance,new carport, level and re-turf the backyard....loads of work to do, but the end result will be amazing. I cant wait. We've been working around the clock to get it sorted for the school holidays in just a couple of short weeks away.
It will be so nice.
Inside our home it's quite small (but I like it)...outside is where we do most of our living especially in summer. So we will soon have a new room to our house...the ouside room.
We started back in October, however anyone living here in S.E Queensland would know how wet the weather has been this year, esp the last few months.  So the day hubby decided to start...the heavens opened up, still he kept going.  Here Little T decided it would be fun sticking on some diving flippers (???) and sludge thru the wet mud...It looked liked fun, I was tempted to join him.


Mmmmm, mud pies....

In the end we decided just to hose him off....LOL

Here are a few pics of our changing nest...
day 1...Poor guy.  He had his tractor,..bull dozer ...whatever thing they call that he's on, and he was determained to get it done.


UGH!  What a mess!  Damn that rain!  It doesnt make the job easy.

Success!!  He managed to to dig out, level and make a retaining wall!!

Day 2....the footings are laid.  Bricks arrived.

Finally...better weather....AND the pillars are built.

Since these pics were taken we have managed to have the entire wall built, rendered and painted. It is 95% finished. We still have to put hardwood in one section...then done.
I thought I had the latest pics on my camera...but i didnt. When I get a chance later I will put some more pics up.
Next we have the pool area and the front courtyard to pave.
Very exciting. I cant wait to sit out around the pool in summer late afternoon with hubby and the kids with a glass of wine, some yummy food, candles and music...ahhhh, dont you love QLD summers?
Bring it on...!




Thursday, November 11, 2010

♥ On this day...

♥♥HaPpY AnNnIvErSaRy To Us!♥♥

8th november 2010.  12th wedding anniversary aboard a gondala...very romantic♥
Ive been MIA lately as Ive been a little pre-occupied.  On the 8th November 1998 at 1pm my husband and I became one.  We vowed to spend the rest of our life together forever and to care and cherish each other.  Little did I know that it would just keep getting better and better each day, each year.
I know, I know.....gush, gush {where's a bucket} but I have to say its true.   Im lucky to have met and spend the rest of my life with my sweetheart, my soulmate, the love of my life...how lucky am I?
Im going to get all pathetic here and just tell you how luck I am.  My husband is super romatic, loving, gentle, *naughty* fun, respectable, reliable, safe, beautiful, understanding, amazing, spiritual, deep and I cannot even begin to tell you how much I just love him.
He is my heart and soul.  An amazing man, wonderful husband and amazing daddy.
When our daughter was born he told me that I was the air he breathes and our daughter is the blood in his veins.
He has helped me with so much of my skeletons and baggage from my past {family stuff *UGH*} and he is my rock, my stability.
This anniversay we stayed away for 2 nights alone and had amazing time....just talking, talking, talking....we shared dinner on a private gondalah *swoon* and we just had a magic time *wink*wink*.
So On the 8th of November I dedicate this to 'us'....~{in my eyes} the most perfect couple ever!!

Thursday, October 28, 2010

Beautiful name frames for my little girl.

Today I have been sneezing, coughing, sniffling and sleeping.  *blah* Ive been quite sick all day.  I thought I would jump online just to use my brain for the first time all day LOL.
Anyway, I decided to put up a few pics of some art I did for my daughters room some time back.  The results were quite lovely.
I put each letter of her name in a frame and put it on her bedroom wall.  I used fabric for the background....One was soft pink and white stripes, the next princess dresses and tiraras and the last was soft aqua with small white spots.  These colours refelected her room.
I used diecut letters for her name and used 2nd hand wooden frames that I sprayed in antique white (almost a cream).
Instead of simply just hanging them on the wall like that I put sweet ribbon on the hook of each one and tied them in a bow.  I hung them with the ribbon above her white set of tall drawers.

My daughters room has all white furniture, big thick white long curtains with soft sheer ones behind.  Her dooner cover is white with soft pink and beigy pillows.  She also has a feature wall that is a mullberry colour {the wall the frames are hung}
My daughter is 7 so the Princess theme is still big in her life.  I think these little frames fitted nicely in her cute room.

Sunday, October 17, 2010

Bruno Mars - Just The Way You Are acoustic cover by Matt Beilis

Hi all...HaPpY SuNdAy!  I just had to share this AMAZING cover of this song by Matt Beilis!  I just adore it.  It gave me goosebumps when i saw/heard it and also a little teary, it is so beautiful.  How AMAZING is this guys voice!?!?
Enjoy....


Wednesday, October 13, 2010

My old mirror has had a makeover.


Ok, my second project for the week was redoing a mirror that was given to us as a wedding gift when my husband and I got married almost 12 years ago.
I absolutly lurved it when it was given to us and it hung on our wall for about 7 years, for the last 5 it has pretty much sat in a cupboard, {with the top off it} not realy knowing what to do with it.
It was a mirror that was made especially for us, wonderfully made and stained a nice baltic look.
The thing is, it isnt realy my style anymore so I decided to bring it into 2010 with a makeover.
Here is how my mirror looked just beforew the first lick of paint...


You can see the top wooden panel had come off {lying next to it} after painting I nailed it back on.
I sanded back the edges once again to give it that worn look.  I also added 3 hooks, that I had on hand.  They were silver to start with but I painted them in a flat black and then screwed them in.

This Beautiful mirror now has a new home at our front door {I have already had alot of ooh's and ahh's from friends who have visted}.

♥ Hope you all have a beautiful day xoxox


UndertheTableandDreaming

Monday, October 11, 2010

$8 eBay chair re-do.

Ive been a busy little bee lately making  re-doing 2 things in the last 2 weeks...it has been fun.  My first blog today I will show you my el chepo chair i purchased off ebay.  I spent $8 on the chair itself, and the rest i had here at home so the redo itself didnt cost a cent. 
Im quite proud of the end result, for $8...you cant realy go wrong.

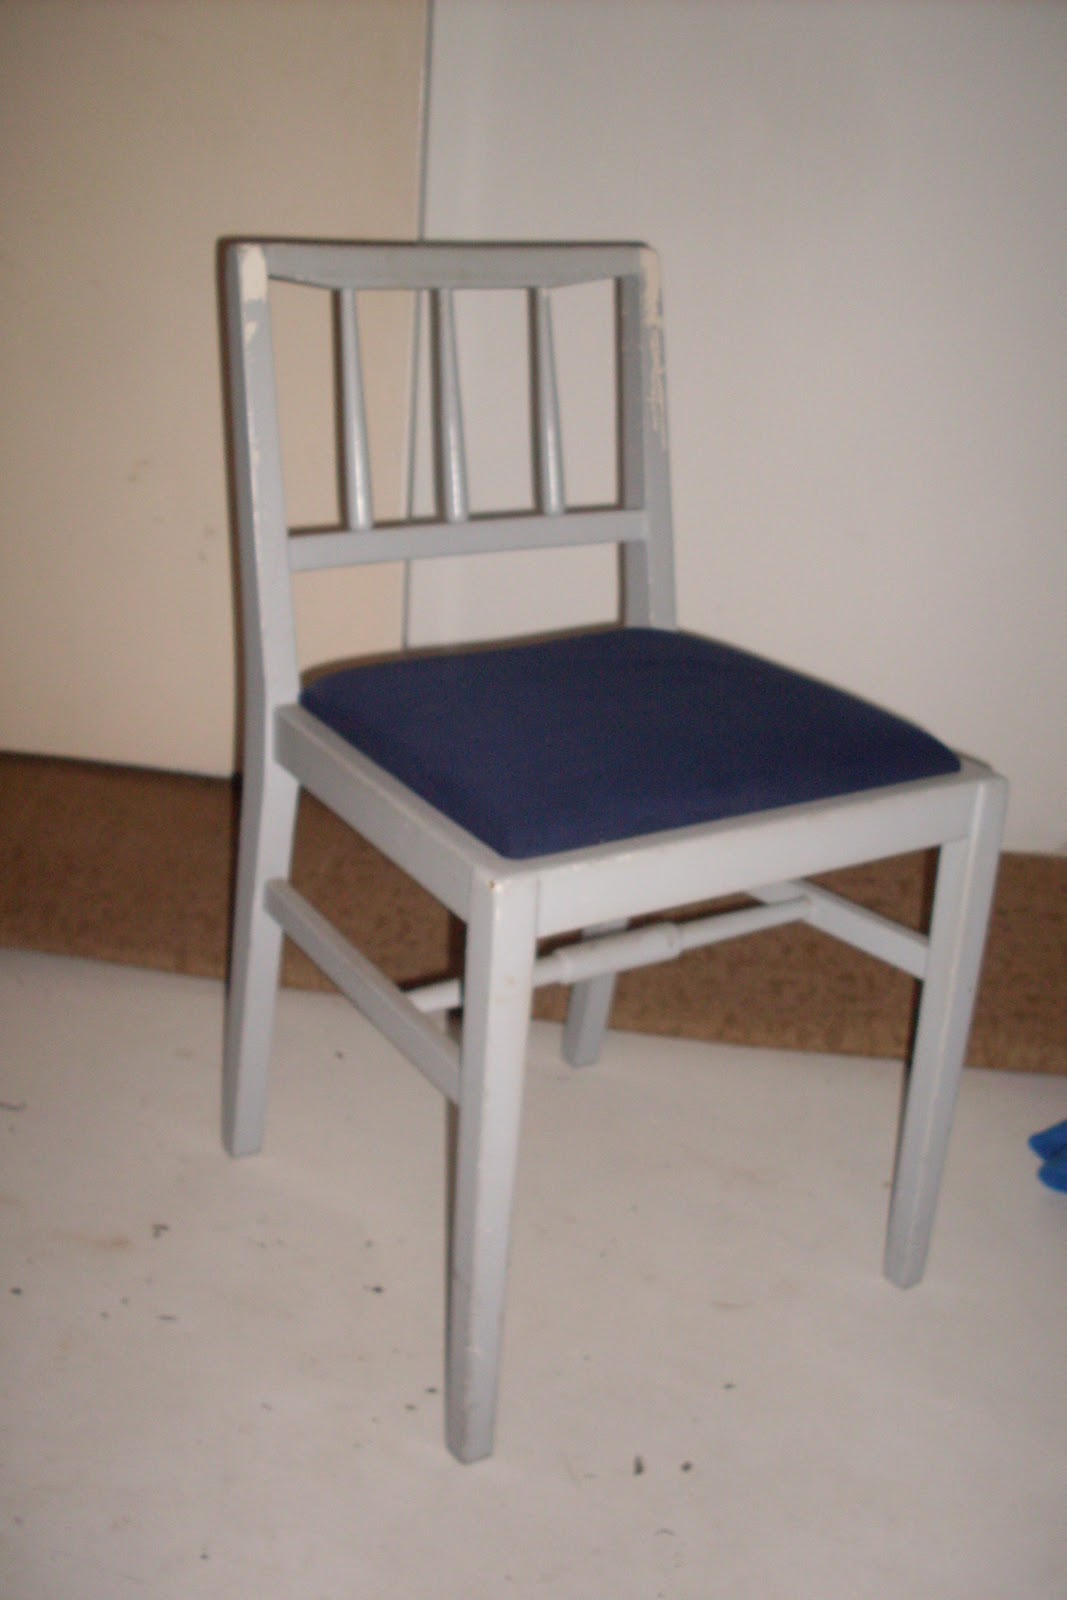
Pretty ugly to begin with, having thick grey paint on it that was totaly scratched all over and lovely royal blue fabric (can you sense my sarcasm here? LOL) However i knew the chair was timber so i knew it had potential.
...and it did!

I pulled off the base and ripped off the ugly, old blue fabric to find that it had already been recovered once before.  There was a cream faux seued looking fabric that was completly stained *ugh*

I decided to cover the seat in hessian but i also wanted to put fabric under that to stop the icky dirty old chair coming thru.  So I used a fresh, brand new, clean beige cotton fabric as my first layer. 


Using my faithful ol' staple gun i attached the new fabric to the chair.


First layer...Done!
I repeated the exact same thing with the hessian...

Next I dusted and cleaned the chair frame, and then painted it a baisic white.


Grey...be gone!!!

DONE!  Now I just had to wait for it to dry, then lightly sand the edges to give it that shabby look.

VOILA!
A new look.  (now I just gotta get rid of that ugly orange cork floor...LOL, thats to come)
I plan on using it in our study eventually.  Theres a bit i want to do in there still. 
So, what do you think...?  Not a bad project for just 8 dollars, huh!?


Friday, October 8, 2010

Beautiful Biscotti

The other day I was looking at cooking somthing tastey, light and simple...Biscotti seemed to cover all that!
I found a lovely recipe in my archives Ive never cooked before...it was very simple and I was so suprised at how easy they are to make.  I had all the ingredients in my pantry already.
I ended up making alot of them and bundling them up in small celephane packages with cute ribbons and handmade tags. 
I gave them to some friends who havnt been too well lately.  They were recieved with open arms and a boiling kettle.
Just the thing to have with a nice cuppa...or perhaps a tastey glass of dessert wine ;0)

What exactly is a biscotti?

In Italian, biscotti literally means twice baked, but at the same time any type of cookie may be called biscotti in Italy. In North America, biscotti refers to a specific type of Italian cookie or biscuit, that is derived from the Tuscan cantucci, a hard almond flavored cookie that is baked twice and usually served with the sweet Italian dessert wine, vin santo.

Hmmmm, interesting huh?  Here's how I made them...
 
Makes

About 40

Ingredients

1 cup (220g) caster sugar
2 eggs
Finely grated rind of 1 lemon
2 cups (300g) plain flour, sifted
1/2 tsp baking powder
150g whole almonds (skin on) *(you could also use lowfat, natural muslie...it works fine, I discovered, I had coles brand on hand)


Method
Preheat oven to 170°C. Line a large baking tray with baking paper.

Place sugar, eggs and grated lemon rind in a large bowl. Beat with electric beaters until pale and thick.

Fold in sifted flour, baking powder and almonds, then use your hands to lightly knead dough on a floured work surface until the dough is smooth.

Divide the mixture in half. Form 2 long logs about 25cm long x 5cm wide and place on prepared baking tray, leaving space between logs. Bake for 20-25 minutes until the dough is firm to the touch and slightly golden. Remove from the oven and set aside to cool completely (about an hour).

Preheat the oven to 140°C.

Once dough is cool, use a small serrated knife to cut each log on the diagonal in 0.5cm slices.

Lay slices flat on the baking tray and return to oven for 15-20 minutes, turning once, until completely dried out. Remove from oven and allow to cool completely.  I sprinkled mine with icing sugar, just to dress them up a bit on the plate.
Store in an airtight container for 2-3 weeks.


♥~Enjoy!